![Fruity Coasters [free pattern] | veni vidi vicky](https://venividivicky.org/wp-content/uploads/2015/07/coaster_header_bearbeitet02.jpg?w=1050)
Hey friends, today it’s my turn at the Summer Blog Party – a blog hop based in Germany, delivering a summer-themed tutorial every day for the course of two weeks. Andrea of Quiltmanufaktur and Susanne of Stoffbreite are hosting. Yesterday, Katharina of greenfietsen shared a tutorial for a wonderful bag, that closes with a knot! Check out the list of all the participants at the bottom of this post! It’s Verena’s (zeit für patchwork) turn tomorrow, I can’t wait to see what she makes. I usually write my posts in English, but today I’m sharing in German, too.
My contribution is a fruity set of coasters. It comes with a pattern and tutorial.
Hallo zusammen, heute ist mein Tag der Sommer Blog Party. Der deutsche Blog-Hop wird von Andrea (Quiltmanufaktur) und Susanne (Quilt it Out) organisiert. Am Ende dieses Posts sind alle Teilnehmner aufgelistet. Diese Woche gab es schon ganz tolle und nützliche Anleitungen für den Sommer. Habt ihr gestern die tolle geknotete Tasche von Katharina (greenfietsen) gesehen? Morgen ist dann Verena (zeit für patchwork) an der Reihe. Ich bin schon gespannt was sie vorbereitet hat!
Mein kleiner Beitrag ist ein fruchtiges Set Glasuntersetzer. Hier kommt die Anleitung inklusiver Vorlage.
![Fruity Coasters [free pattern] | veni vidi vicky](https://venividivicky.org/wp-content/uploads/2015/07/fabricpull.jpg?w=1050)
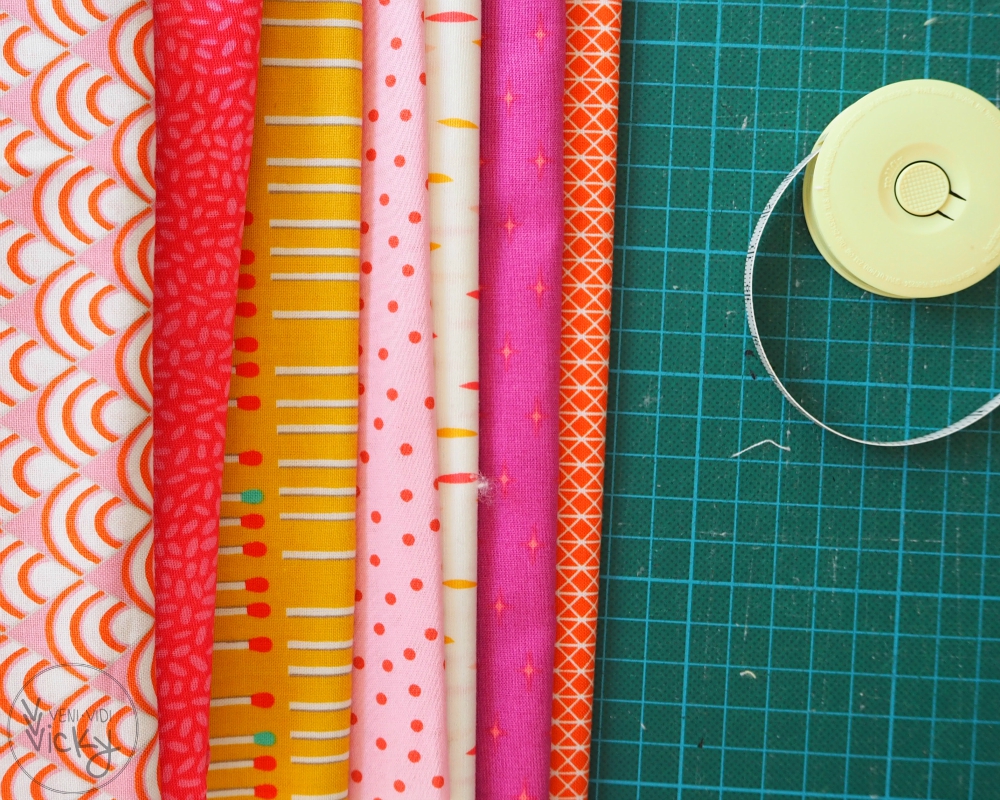
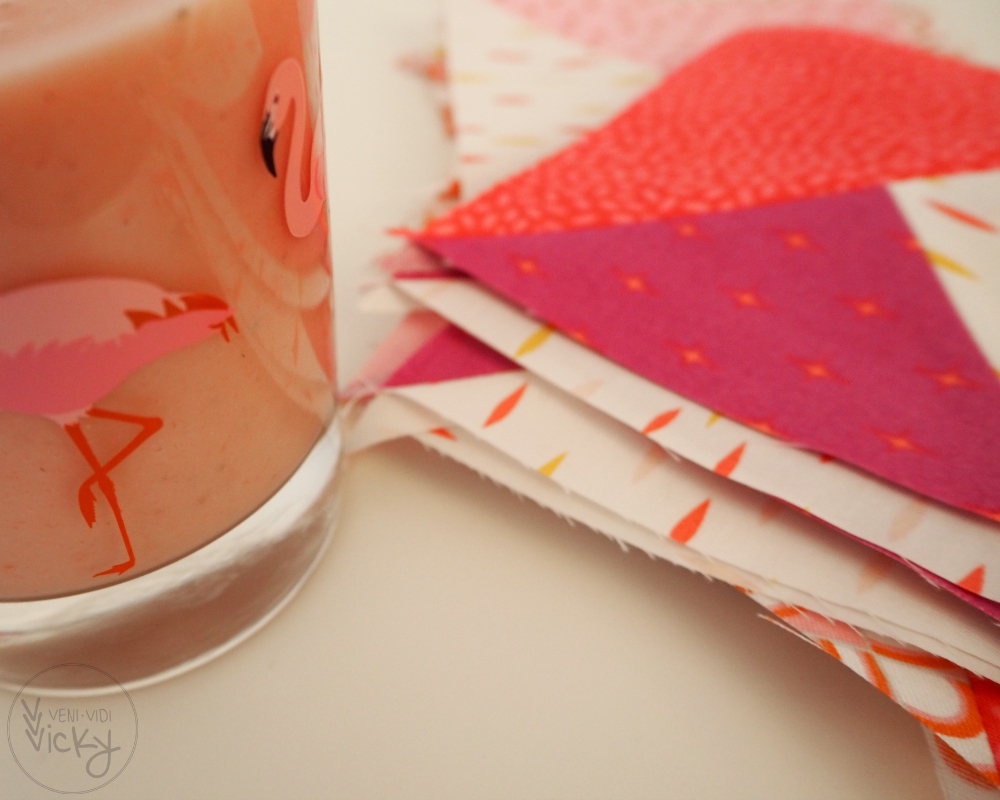
MATERIALS for 5 coasters:
* fabric in pink, orange and citron, about a Fat Quarter of Each
(generous measure!)
* print outs of the pattern
(please note you need a sheet for each citron and orange block)
* muslin fabric for the background
(super cheap and has a lovely natural look to it) scraps of batting
MATERIAL für 5 Untersetzer:
* Stoff in pink, orange und zitronengelb, je circa ein Fat Quarter
(das ist aber großzügig bemessen)
* Nesselstoff als Hintergrund
(sehr preiswert und hat einen schönen ‘Naturlook’)
* Die bei 100% ausgedruckte Anleitung
(bitte beachten: bei Zitrone und Orange wird pro Block ein Ausdruck gebraucht!)
* Ein bisschen Volumenvlies (prima Resteverwertung!)
First print the pattern / Zuerst die Vorlage ausdrucken
![Fruity Coasters [free pattern] | veni vidi vicky](https://venividivicky.org/wp-content/uploads/2015/07/pattern_preview1.jpg?w=1050)
For the first step, piece the (circular) blocks according to the pattern. Part of the process calls for foundation piecing. If you’re new to this or need a little reminder, take a look at this video.
Zunächst solltet ihr die (runden) Blöcke laut der Vorlage zusammensetzen. Dafür müsst ihr teilweise die Foundation Paper Piecing Methode anwenden. Wenn ihr das noch nie gemacht habt, oder eine kleine Wissensauffrischung braucht, empfiele ich dieses Video.
![Fruity Coasters [free pattern] | veni vidi vicky](https://venividivicky.org/wp-content/uploads/2015/07/tutorial02.jpg?w=1050)
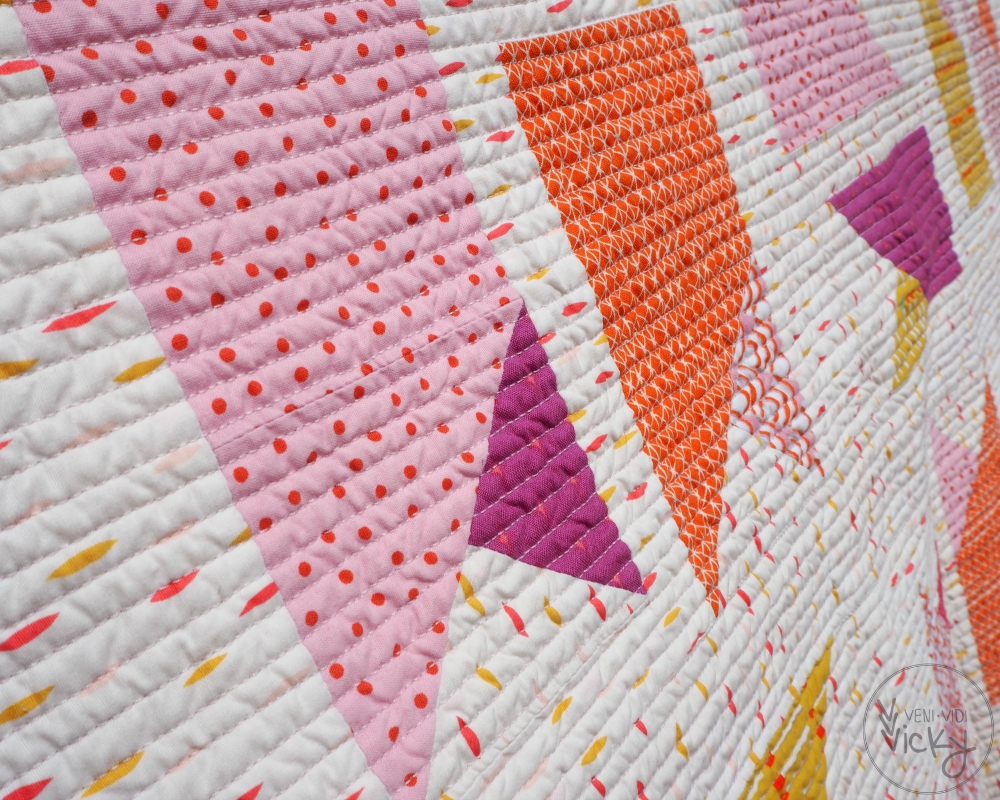
After you have your blocks ready, quilt them. In order to do so cut a small piece of batting and place it under your fruit block – no backing or pinning needed. Quilt as desired. (I’m a straight-line-quilting devotee!)
Wenn ihr die Blöcke fertig genäht habt, werden sie gequiltet. Schneidet dazu ein passendes Stück Vlies aus, legt es unter den Block und fangt an abzusteppen. Eine Rückseite oder voriges Pinnen ist hier nicht nötig. Quiltet die Blöcke so wie ihr mögt (Ich bin ein großer Straight-Line-Quilting Fan!)
![Fruity Coasters [free pattern] | veni vidi vicky](https://venividivicky.org/wp-content/uploads/2015/07/tutorial03.jpg?w=1050)
Now take a compass or a round object of the right size (a diameter about 3/4″ shorter than your block) and mark on the muslin. This will be the backside of the coaster. Mark another smaller circle 1/4″ from the edge. Put the quilted block and the backside right sides together and sew round on the marked line. It’s important to leave about 1/5th of the circle open. Backstitch at start and finish to secure your seam.
Nun schnappt euch einen Zirkel, oder auch einen passend großen runden Gegenstand (ungefähr 2cm kleiner als der Block im Durchmesser) als Vorlage für die kreisförmige Nessel-Rückseite des Untersetzers. Markiert 1/4″ vom Rand die Nahtlinie. Legt den gequilteten Block und den Kreis auf rechts zusammen und näht entlang der gekennzeichneten Linie. Dabei muss circa ein Fünftel des Kreises “offen” bleiben. Die Naht am Anfang und Ende kurz vernähen.
![Fruity Coasters [free pattern] | veni vidi vicky](https://venividivicky.org/wp-content/uploads/2015/07/tutorial04.jpg?w=1050)
![Fruity Coasters [free pattern] | veni vidi vicky](https://venividivicky.org/wp-content/uploads/2015/07/tutorial05.jpg?w=1050)
After sewing trim with a 1/8″ seam allowance. Turn your coaster inside out, press the opening closed and sew near the edge to finish your coaster. Bury the threads on the backside.
Nach dem Nähen, schneidet auf die richtige Größe zu. Am besten mit einer sehr knappen Nahtzugabe von 1/8″. Nun dreht das Genähte von Innen nach Außen, bügelt die Öffnung zu und näht erneut dicht entlang des Randes. Am Ende müssen noch die Fadenenden verknotet und abgeschnitten werden (am Besten auf der Rückseite).
![Fruity Coasters [free pattern] | veni vidi vicky](https://venividivicky.org/wp-content/uploads/2015/07/coasters01.jpg?w=1050)
![Fruity Coasters [free pattern] | veni vidi vicky](https://venividivicky.org/wp-content/uploads/2015/07/coasters07.jpg?w=1050)
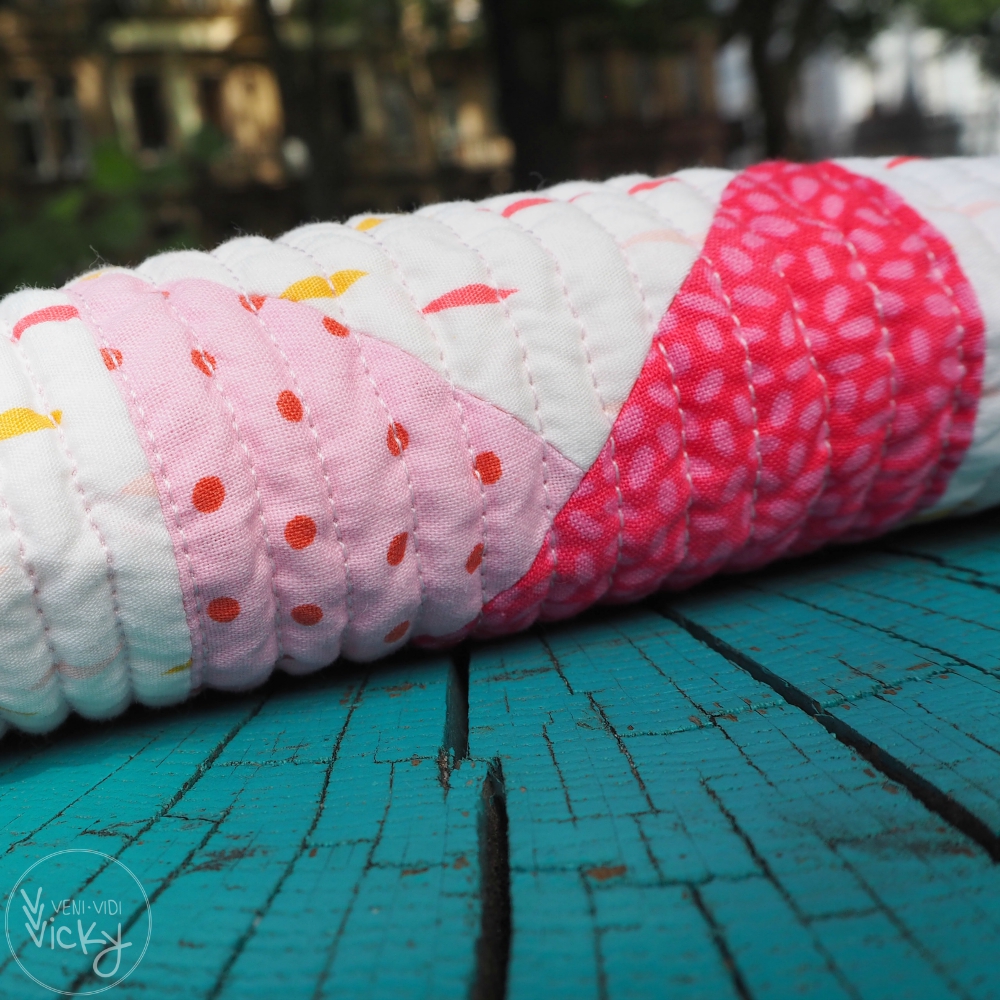
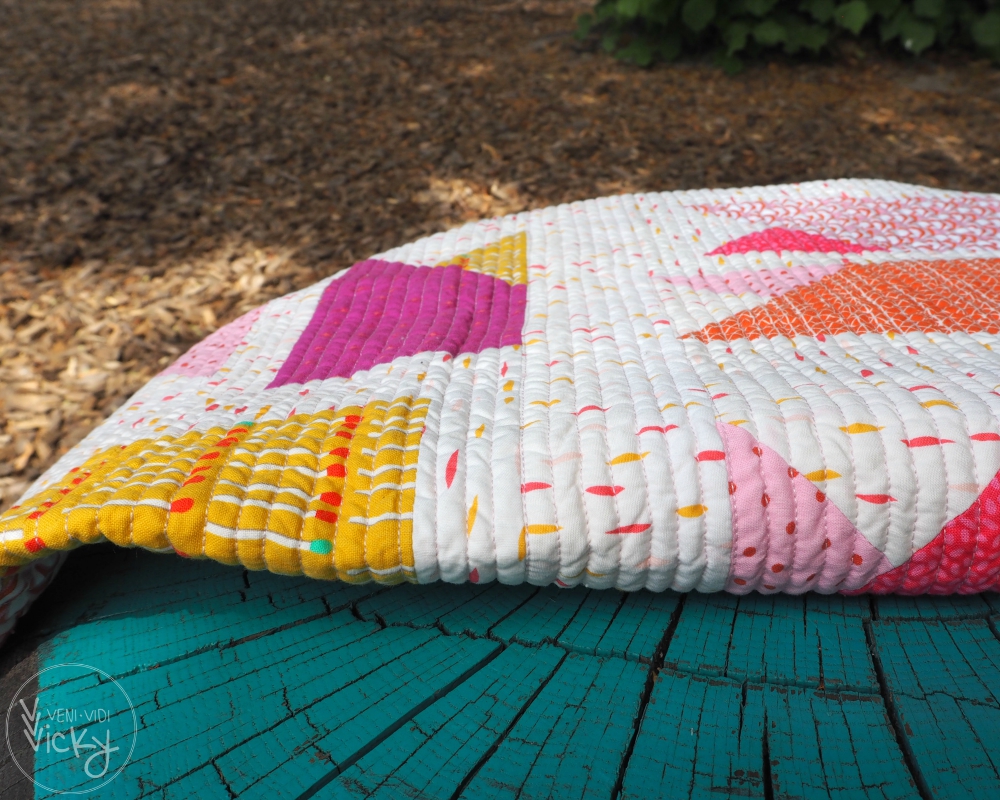
These little coasters are pretty quick to make and could make a nice little gift for a friend, just because =) Last year I sewed up a storm of coaster sets to bring to various weddings. I love to give personal things, but there isn’t always time to make a whole quilt.
Die Untersetzer sind ein schnell zu nähendes Projekt, und lassen sich gut verschenken. Letztes Jahr habe ich einige Untersetzer Sets als Hochzeitsgeschenke verschenkt. Das war eine ziemlich einfache Art einem unpersönlichen Geldgeschenk einen persönlichen Touch zu geben, ohne gleich ein ganzes Quilt nähen zu müssen.
![Fruity Coasters [free pattern] | veni vidi vicky](https://venividivicky.org/wp-content/uploads/2015/07/coasters11.jpg?w=1050)
![Fruity Coasters [free pattern] | veni vidi vicky](https://venividivicky.org/wp-content/uploads/2015/07/coasters05.jpg?w=1050)
![Fruity Coasters [free pattern] | veni vidi vicky](https://venividivicky.org/wp-content/uploads/2015/07/coasters02.jpg?w=1050)
Fabrics used are from Cotton + Steel, Lotta Jansdotter and Carolyn Friedlander. That’s a pretty precise representation of designs I love!
Die verwendeten Stoffe stammen aus Cotton + Steel, Lotta Jansdotter und Carolyn Friedlander Kollektionen. Eine ziemlich gute Repräsentation meiner Lieblingsdesigner!
![Fruity Coasters [free pattern] | veni vidi vicky](https://venividivicky.org/wp-content/uploads/2015/07/coasters09.jpg?w=1050)
The citron and the orange blocks are a little tricky as a lot of seams are meeting at the center point. I could have done better ;-)
Die Zitronen- und Orangenblöcke sind etwas trickreich, weil sich mittig sehr viele Nähte treffen. Bei mir besteht da noch Steigerungspotential.
![Fruity Coasters [free pattern] | veni vidi vicky](https://venividivicky.org/wp-content/uploads/2015/07/coasters08.jpg?w=1050)
The melon is quite a bit easier, even just a set of varisou “melon-sections” could be nice.
Der Melonenblock ist deutlich einfacher. Man könnte auch ein Set aus nur verschiedenen Melonenschnitzen nähen.
![Fruity Coasters [free pattern] | veni vidi vicky](https://venividivicky.org/wp-content/uploads/2015/07/coasters03_bearbeitet.jpg?w=1050)
![Fruity Coasters [free pattern] | veni vidi vicky](https://venividivicky.org/wp-content/uploads/2015/07/coasters06.jpg?w=1050)
Follow me on bloglovin‘ and stay tuned for more projects.
Folgt mir einfach auf bloglovin’ und verpasst keines meiner neuen Projekte =)
We’re now 5 days into our blog hop and there are even more great projects to follow. So stay tuned =)
Seit 5 Tagen läuft der Blog Hop nun, und es folgen noch viele tolle Projekte. Bleibt gespannt!
![Fruity Coasters [free pattern] | veni vidi vicky](https://venividivicky.org/wp-content/uploads/2015/07/logo.jpg?w=1050)
| 13.07. Aylin (aylin-nilya) | 14.07. Gesine (allie and me design) |
| 15.07. (ellis and higgs) | 16.07. Katharina (green fietsen) |
| 17.07. Vicky (veni vidi vicky) | 18.07. Verena (zeit für patchwork) |
| 19.07. Claudia (machen und tun) | 20.07. Barbara (das mach ich nachts) |
| 21.07. Johanna (johanna rundel) | 22.07. Angela (patchwork angela) |
| 23.07. Ute (durbanville design) | 24.07. Susanne (stoffbreite) |
| 25.07. Kinga (kinga isabella quilts) | 26.07. Andrea (quiltmanufaktur) |

This post is linked up with TGIFF this week at Quilt Matters,
Finish it Up Friday at crazymomquilts, Freebie Freitag,
Sew Cute Tuesday at Blossom Heart Quilts, Fabric Tuesday
at Quiltstory, Tips and Tutorials Tuesday at Late Night
Quilter, Let's Bee Social at Sew Fresh Quilts and Needle
and Thread Thursday at My Quilt Infatuation.
coasterscotton and steeleasy sewingfoundation piecingpaper piecingquilted giftstutorial


![Fruity Coasters [free pattern] | veni vidi vicky](https://venividivicky.org/wp-content/uploads/2015/07/coaster_header_bearbeitet02.jpg)
![Fruity Coasters [free pattern] | veni vidi vicky](https://venividivicky.org/wp-content/uploads/2015/07/fabricpull.jpg)
![Fruity Coasters [free pattern] | veni vidi vicky](https://venividivicky.org/wp-content/uploads/2015/07/pattern_preview1.jpg)
![Fruity Coasters [free pattern] | veni vidi vicky](https://venividivicky.org/wp-content/uploads/2015/07/tutorial02.jpg)
![Fruity Coasters [free pattern] | veni vidi vicky](https://venividivicky.org/wp-content/uploads/2015/07/tutorial03.jpg)
![Fruity Coasters [free pattern] | veni vidi vicky](https://venividivicky.org/wp-content/uploads/2015/07/tutorial04.jpg)
![Fruity Coasters [free pattern] | veni vidi vicky](https://venividivicky.org/wp-content/uploads/2015/07/tutorial05.jpg)
![Fruity Coasters [free pattern] | veni vidi vicky](https://venividivicky.org/wp-content/uploads/2015/07/coasters01.jpg)
![Fruity Coasters [free pattern] | veni vidi vicky](https://venividivicky.org/wp-content/uploads/2015/07/coasters07.jpg)
![Fruity Coasters [free pattern] | veni vidi vicky](https://venividivicky.org/wp-content/uploads/2015/07/coasters11.jpg)
![Fruity Coasters [free pattern] | veni vidi vicky](https://venividivicky.org/wp-content/uploads/2015/07/coasters05.jpg)
![Fruity Coasters [free pattern] | veni vidi vicky](https://venividivicky.org/wp-content/uploads/2015/07/coasters02.jpg)
![Fruity Coasters [free pattern] | veni vidi vicky](https://venividivicky.org/wp-content/uploads/2015/07/coasters09.jpg)
![Fruity Coasters [free pattern] | veni vidi vicky](https://venividivicky.org/wp-content/uploads/2015/07/coasters08.jpg)
![Fruity Coasters [free pattern] | veni vidi vicky](https://venividivicky.org/wp-content/uploads/2015/07/coasters03_bearbeitet.jpg)
![Fruity Coasters [free pattern] | veni vidi vicky](https://venividivicky.org/wp-content/uploads/2015/07/coasters06.jpg)