

Spoonflower is offering free (worldwide) shipping for 24 hours today. This is the perfect chance to order your personalized sewing tags and pay very little money for it, especially if you’re based outside of the US like I am.
So here’s my tutorial I originally contributed to The Cozy Pumpkin’s Tuesday Tips installment. Check out the wonderful tips and tricks Amanda has been collecting in this series!
Maybe you’re like me and have been meaning to get personal sewing tags for a long time? After some research I found I couldn’t justify ordering 500 at a time or spending a fortune on a small amount with an uneconomic ratio. Since I had my logo ready, all that I needed was someone to print it on the right textile for me. The layout and even the cutting I could do myself.
What you need:
digital layout program (can be Creative Suite or any other)
Spoonflower account
fusible interfacing
fabric scissors
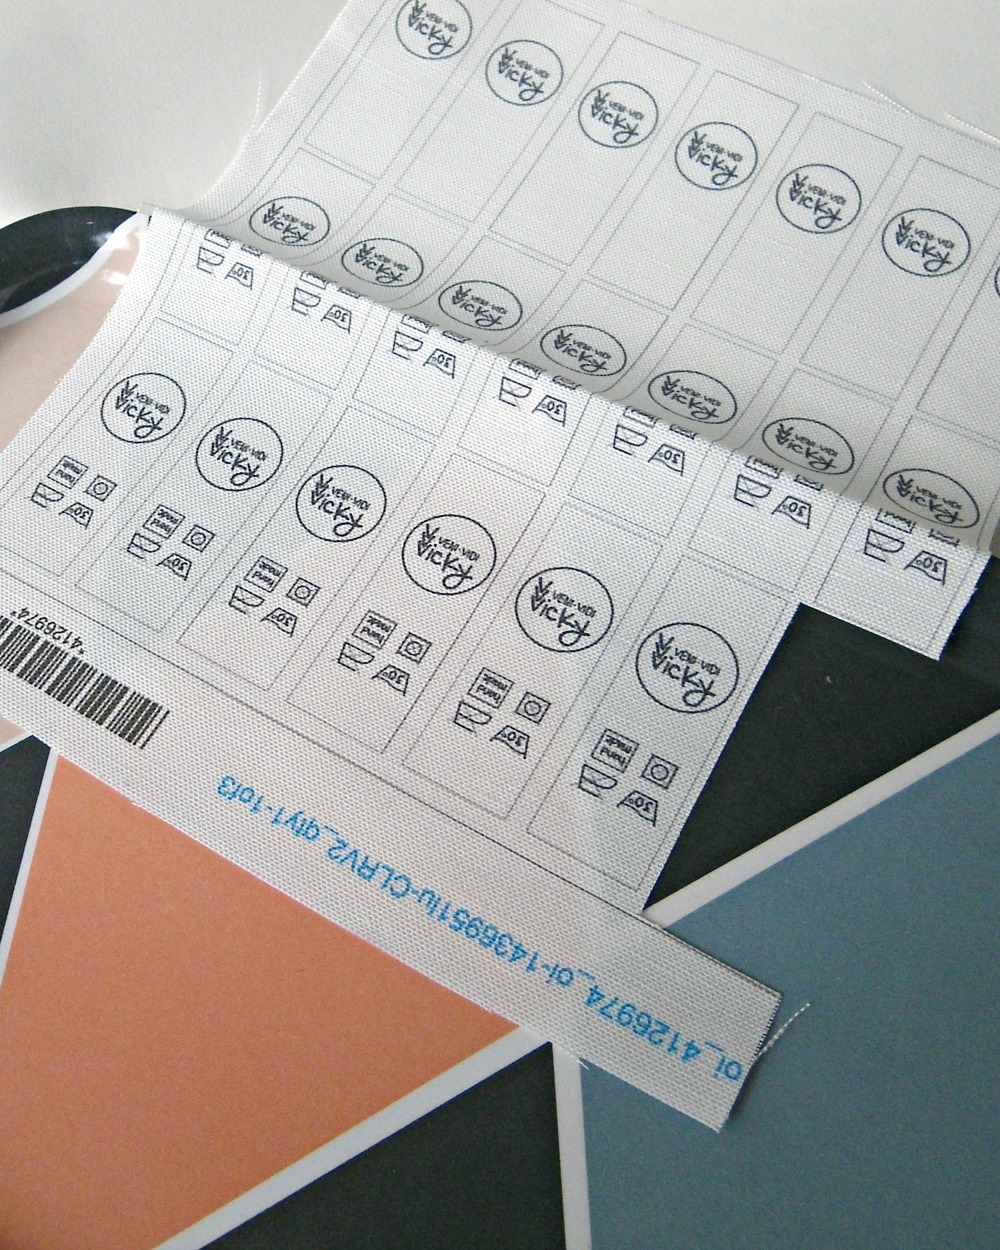
Spoonflower offers any 8” x 8” test swatch for 5$ each. This is a good start for a test run of tags and will be the canvas (in the true sense of the word) for our digital layout.
First think about what kind of tag you want. What size should it be? Do you want to sew it in on the short or on the long side? What kind of info (besides) your logo would you like on it?
Open a new document with the exact dimensions of 8″ x 8″ in your layout program. Draw a rectangle of the desired size of your (flat) sewing tag. Don’t forget to add at least 1/4” seam allowance on either side where the tag will be sewn in later. Mark the middle of the rectangle as well as the seam allowances with reference lines (delete these later or turn them off). Place your logo and everything else you want on the little rectangle. Be very precise with the placements and directions in which your items face (see pic below!)

When you’re happy with your layout, group all items, copy, paste. Now start arranging the tags on your canvas. Leave a printing and cutting allowance of about 1/4” around the entire edge of the canvas and leave a little cutting space of about 1/4” in between all tags (this is pretty important for later!).
Once you’re done save as TIFF/JPG with a recommended resolution of 300 dpi. When uploading to Spoonflower it is important to remember which resolution you chose, so maybe write that down.

Now that you have your file it’s time to upload it to Spoonflower. For that it must be smaller than 40MB, which shouldn’t be much of a problem unless you picked a super high resolution (go back and tune it down). Once the site is done uploading (it takes a while…) select test swatch (size) and linen-cotton canvas (material).
Type your resolution number in the box and click ‘change’ to adjust it from the default 150 dpi. Check if everything looks like your layout (same amount of tags?) and nothing’s cut off. Then put the item in your shopping cart and check out.

Fast forward to your labels having been delivered to you. Take your swatch and cut one of the labels out using your fabric scissors. Important: Don’t cut on the lines but cut in the blank space, roughly in the middle of two tags on all of the sides!
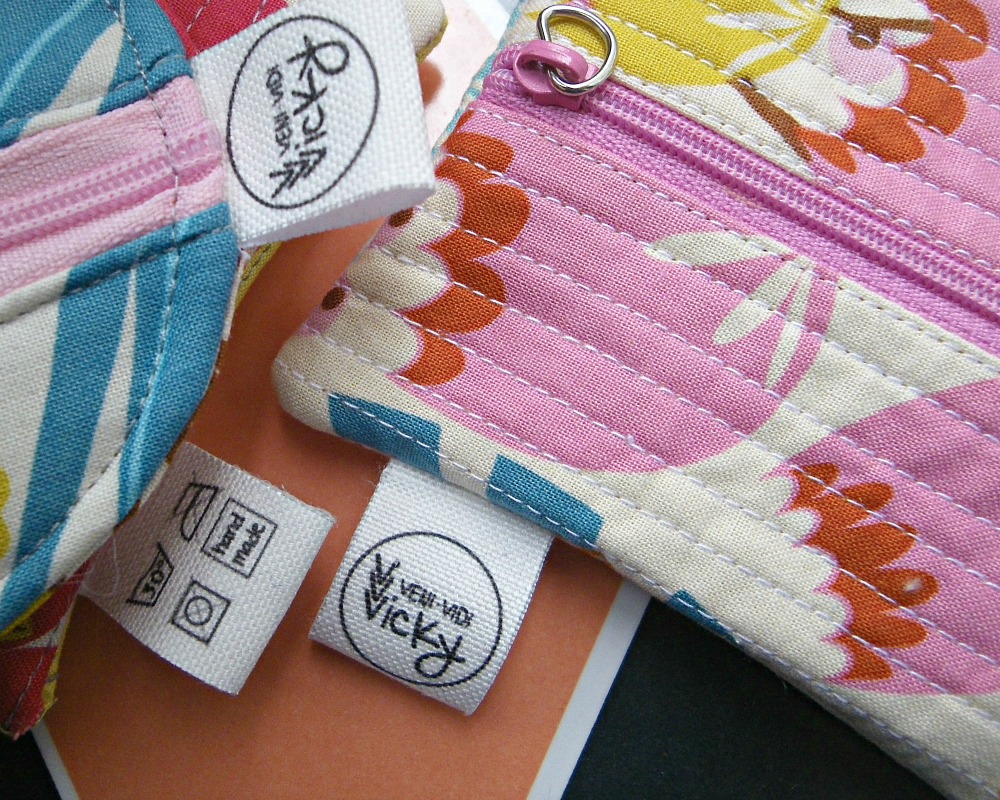
Cut a piece of interfacing a little larger than the tag you just cut out. Add it to the back of said tag with your iron very thoroughly. Follow the instructions that come with the interfacing. Wait a little while to let the whole thing cool down. Then cut the tag out precisely on the line of your marked rectangle.
Now you hold that tag in your hand, ready to be sewn in! Consider securing the open ends of your tag using a dot of glue or a simple stitch. You could prepare all your tags at once and store them so you have one on hand whenever you need it! I Hope you have fun with your personal tags for only about 0.2$ a piece =)
So, be quick and go get yourself some tags with your logo on it today!

This post is linked up with Sew Cute Tuesday at
Blossom Heart Quilts and Let's Bee Social at
Sew Fresh Quilts and Tips and Tutorials Tuesday at
Late Night Quilter.

Thanks for sharing. I will order today!!
If you want to share your results, I’d love to see pictures of your labels =)
What a super clever way to put Spoonflower to good use! Thank you!
Thank you Sarah, I’m happy to share =)
Adorable! These are really cute – will have to check this out.
Ordering custom print fabric is a great starter point for labels, if you don’t need a larger amount (yet).
This is one of the most pinned tutorials from Tuesday Tips. :) It’s a really great tutorial. Thanks for sharing it on my blog.
Hey Amanda, hope you’re cool with me reposting it here. When I saw Spoonflower’s announcement of free shipping I thought it might help to repost it.
Great tutorial! Thanks for sharing!!
Thank you for stopping by, Preeti!
That is a great idea! I love personalized tags on handmade things, but I never wanted to pay to have some made. This is a wonderful alternative.
This is a great tutorial. I’ll stash this idea away for later.
Thank you for stopping by, Lisa. Let me know if you have any questions when getting to it =)
This is a great tutorial and something I have been thinking about doing for myself for a while now. Thanks for the nudge. I think I know what I’ll be playing with later today! :)
Let me know how it goes =) Thank you for stopping by, Yvonne!
This is great! Thanks for sharing!
[…] them with your Pinning finger ready. One of my favorites from last week was this tutorial by Veni Vidi Vicky on how to make your own sewing tags (which could easily be adapted to making your own quilt […]
Reblogged this on Petals and Pins and commented:
Great tutorial! This is something I want to do in the future. Re-blogging so I don’t lose it ;) Thanks Vicky!
[…] Source Here Adding a label or tag to a garment can have a variety of benefits. It can help you keep things in […]